eLearn’s Digital Literacy Guide: Navigating Our Online Lives Wisely And Safely
The idea of Digital Literacy will always be evolving. As a set of valuable competencies, they have an inevitable bond with technology and its pace.


The idea of Digital Literacy will always be evolving. As a set of valuable competencies, they have an inevitable bond with technology and its pace.
CSS is the visual language of the internet, and Learning Management Systems are no exception. In this list, we hope you find inspiration, simple ideas

In just a couple of years, Docker, an open source platform to make the development of applications more agile, has taken the virtual world by

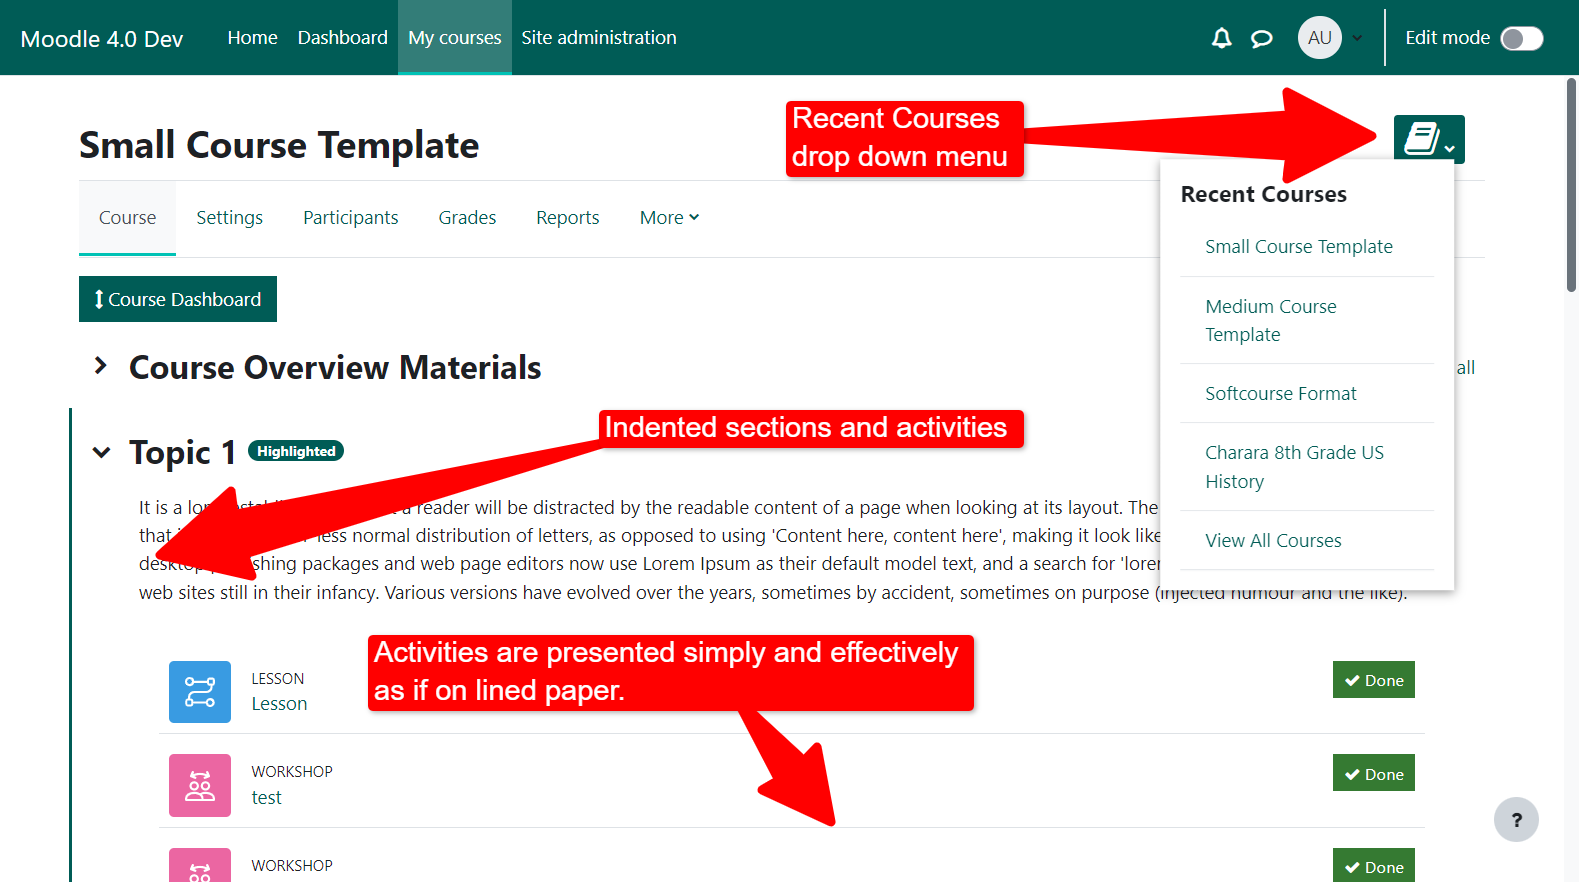
Are you looking for a free Moodle™ hosting platform to start your online learning portal, be it as an individual or part of an organization

July 2023 update: The European unicorn turns private following a deal involving Goldman Sachs Assets Management, LEGO Group’s KIRKBI investment company, Glitrafjord —fund controlled by Kahoot CEO— and General Atlantic which remains the app’s largest stakeholder. The deal with a 53% premium on the latest stock price values Kahoot at $1.7 billion USD, keeping it into unicorn territory but a far cry from their lockdowns height.

AI as Your Virtual Tutor? The Promise, The Peril, The Possible Do you recall feeling at times like you were a foreign language student sitting

Available in English En este tutorial: Canvas continúa siendo la plataforma LMS más popular en la educación superior de Estados Unidos. Y con su reciente
Updated in December, 2022 Best Themes of 2022 All the themes are compatible with the 4.X series № 10. LearnR by Chris Kenniburg theme_learnr The

At its core, a CRM is a database, a platform and a center of operations for organizations who deem exceptional customer service a must. Inside

Companies impact people’s lives, since most of the time of their working life they are on the installations and even more so if there are